|
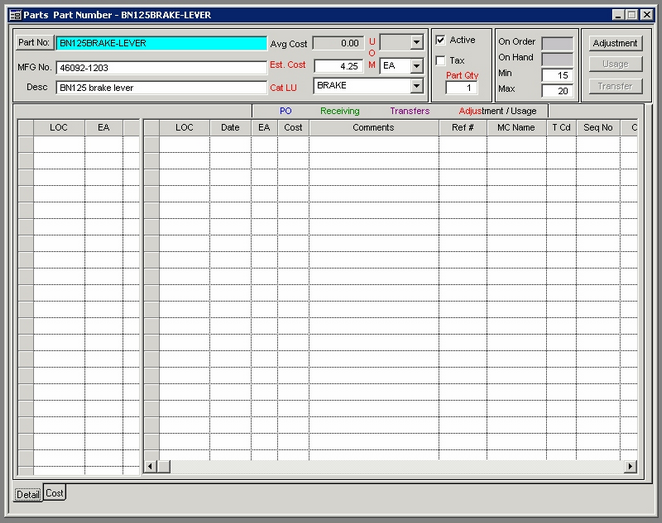
Creating a PART:
Note: each Purchase Order (PO) displays parts info in the following order:
Desc, Model (+ “Part No.:), MFG Part No. (from Vendor detail on Parts / Cost tab)
| a- | Open Parts screen from: main menu Forms / Motorcycles (or Purchase Order) / Forms / Parts. |
| i. | The current naming convention without spaces is: Model (5 characters), Category (4 or 5 characters), - (dash),
Description (25 characters max);
Example for a Kawasaki BN125 brake lever: BN125BRAKE-LEVER |
| c- | Input balance of info in header area (mandatory fields are indicated in RED): |
| i. | MFG No.: Informational only; does not appear on the PO. |
| ii. | Desc: Informational and does appear on the PO. |
| iii. | Avg. Cost: computed by the system based on history |
| iv. | Est. Cost: Informational only; does not appear on the PO. |
| v. | Cat LU: Category Lookup: Drop Down select from Categories that were setup in Parts Category master. |
| vi. | Select UOM (Unit of Measure) |
| vii. | Select “Active” checkbox. An inactive part is not available during PO creation. |
| viii. | Select “Tax” if taxable |
| ix. | Input Part Qty (= number of this particular part that are on a single motorcycle) |
| x. | Input Min (minimum desired inventory qty level – triggers update to Need-to-Buy report) |
| xi. | Input Max (maximum desired inventory quantity level): |
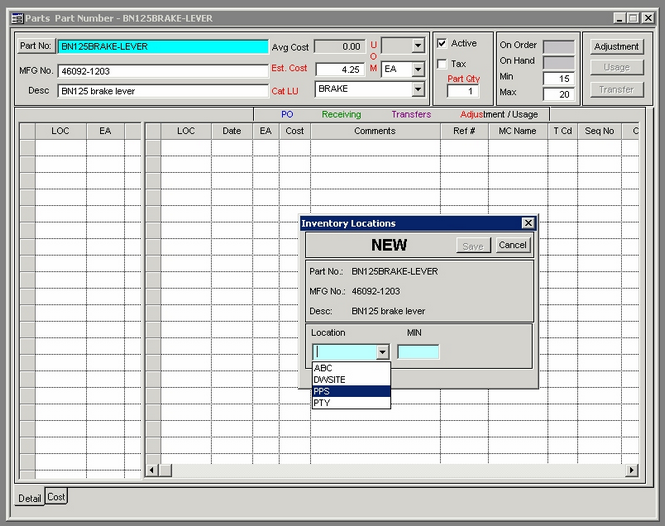
| d- | While on Detail tab input inventory locations (LOC) in left-hand window (Right hand window shows Part history): |
| i. | Click on top row under LOC – EA and press the “Insert” key. |
| ii. | Select the inventory LOC from the dropdown and input the minimum desired inventory level: |
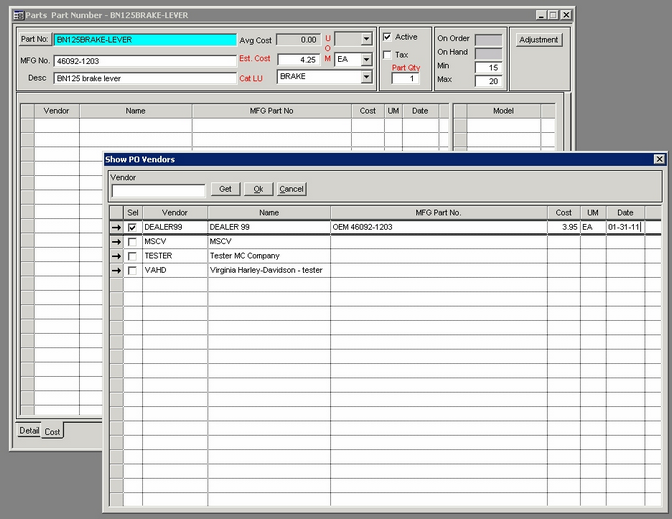
| i. | Click on top row under Vendor and press the “Insert” key. |
| ii. | Input a partial Vendor name for a shorter list and press “Get” - or - press “Get” without entering a partial name to return all vendors. |
| iii. | Input the Vendor particulars for this part and click “OK”
Note that the Vendor’s MFG Part No and Cost are what get applied to a PO: |
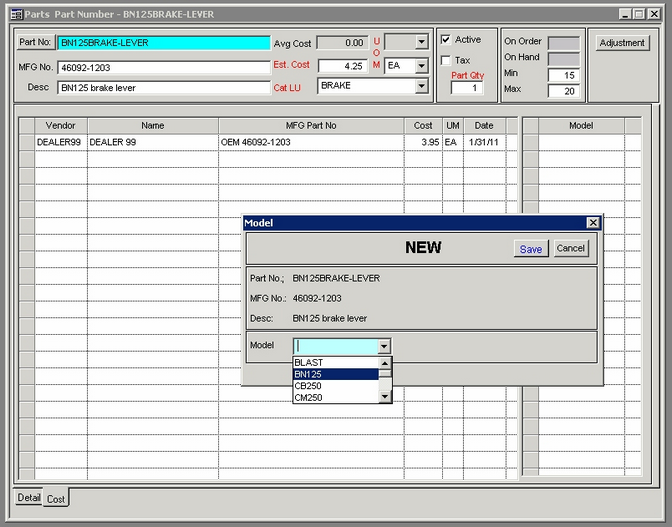
| f- | Stay on the “Cost” tab. |
| i. | Click on top row under Model and press the “Insert” key. |
| ii. | Select the MC Model from the dropdown and click on “Save”: |
| g- | IMPORTANT: Click the “Save” icon or press "Ctrl + S" to save your new part. |
|